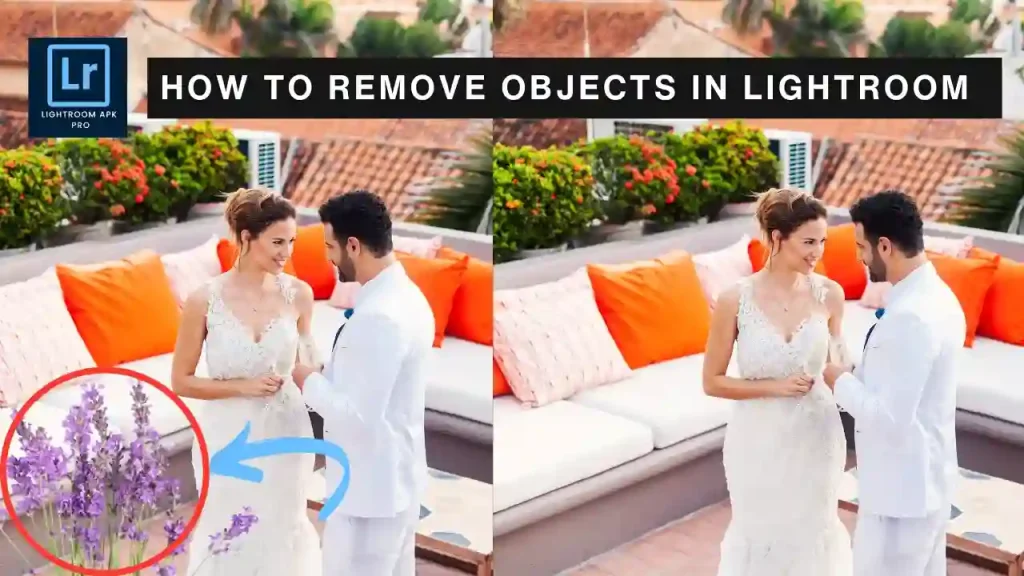
Getting rid of unwanted objects, in your pictures can greatly enhance the quality of your photos. Adobe Lightroom provides a range of tools that enable you to eliminate these unwanted objects. In this article, I will discuss techniques and approaches you can use to erase objects by using Lightroom.
Preparing Your Image
- Importing the Photo into Lightroom
- Open Lightroom and import the photo you want to edit by clicking on File > Import Photos and Videos.
- Select the photo from your computer and click Import.
- Making Basic Adjustments Before Object Removal
- Adjust the exposure, contrast, and other basic settings to enhance the overall appearance of your photo.
- This will help you see the unwanted objects more clearly and make the removal process easier.
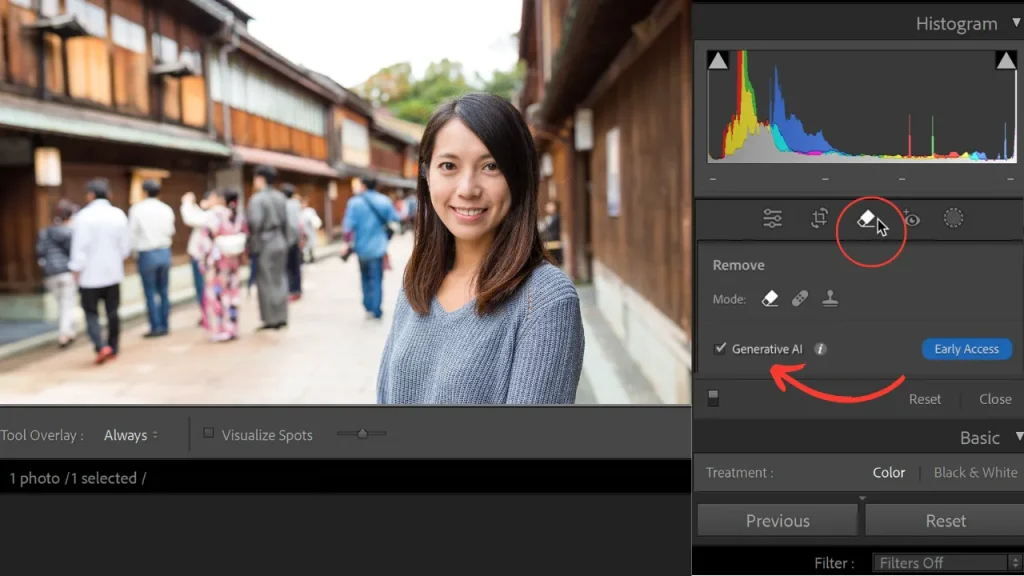
- In the Develop module, click on Remove (previously Healing tool in old versions) in the toolbar.
Method 1: Generative Ai Tool to Remove objects in Lightroom

This tool is available only in latest versions as early access tool.
- Selecting the Generative Remove Tool
- Select Generative AI from the dropdown menu.
- Brushing Over the Object
- Brush over the object you want to remove. Adjust the brush size and overlay opacity for precise selection.
- Use the Add brush to refine the selection or the Subtract brush to remove unwanted areas from the selection.
- Generating the Removal
- Once you have brushed over the object, Lightroom Classic will use Adobe Firefly to generate three different variation options for the removal.
- Select the variation that looks best or click Refresh to generate three new variations.
- Refining the Removal
- Use the Tool Overlay to view the pins when you hover over the image and control when to show the pins of your removed spots.
- Use Visualize Spots to see a high-contrast overlay for accurate selections.
Method 2: Using the Healing Brush Tool

- Selecting the Healing Brush Tool
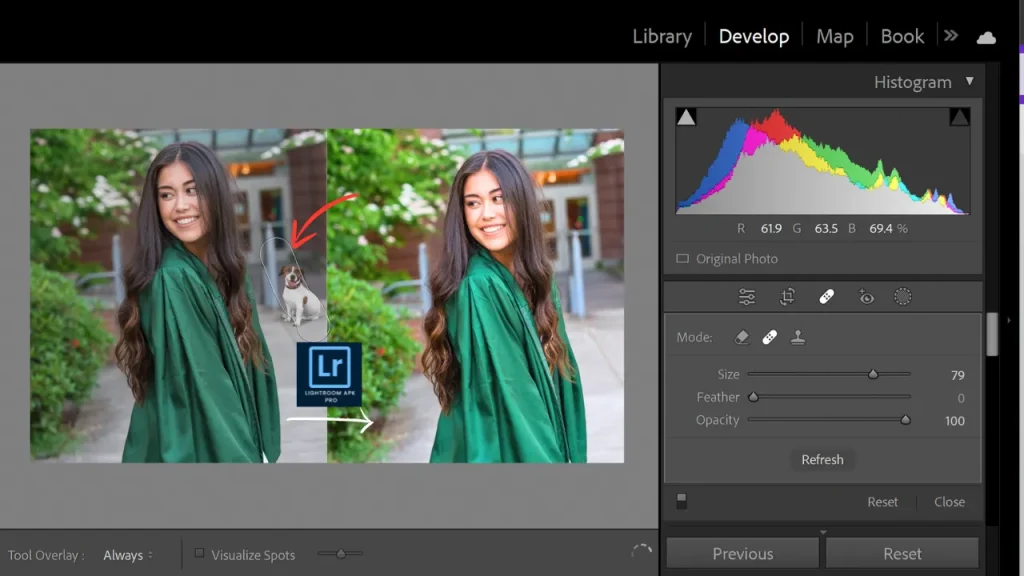
- Click on the Healing Brush tool in the toolbar or press Q on your keyboard to access remove tools.
- Adjusting the Brush Size and Feather
- Use the slider or the bracket keys ([ and ]) to adjust the brush size.
- Increase the feather to blend the edges of the healed area smoothly.
- Painting Over the Unwanted Object
- Click and drag over the unwanted object to paint it with the healing brush.
- Lightroom will automatically replace the object with surrounding pixels.
- Fine Tune the Healing Adjustments
- Use the spot removal panel to adjust the position and size of the healing area if necessary.
- Zoom in to ensure the area looks natural and seamless.
Method 3: Using the Clone Stamp Tool
- Selecting the Clone Stamp Tool
- Click on the Clone Stamp tool in the toolbar or press S on your keyboard.
- Adjusting the Brush Size and Opacity
- Adjust the brush size using the slider or bracket keys ([ and ]).
- Set the opacity to around 50-100% depending on the area you are cloning.
- Copying Pixels from a Similar Area
- Hold Alt (Windows) or Option (Mac) and click on an area that looks similar to the one you want to cover.
- Release the key and paint over the unwanted object.
- Blending the Cloned Area for a Natural Look
- Adjust the cloned area to match the surrounding texture and color.
- Use a soft brush and lower opacity for smoother blending.
Method 4: Content Aware Remove Tool (available 2022 onwards versions)
- Selecting the Content-Aware Remove Tool
- Click on the Content-Aware Remove tool in the toolbar (if available in your version of Lightroom).
- Highlighting the Object to Remove
- Click and drag to highlight the object you want to remove.
- Lightroom will analyze the area and fill it with matching pixels.
- Allowing Lightroom to Fill in the Area
- Wait for Lightroom to process the removal and fill in the highlighted area.
- Adjusting as Needed for Seamless Results
- Use the spot removal panel to make any necessary adjustments to the filled area.
- Ensure the result looks natural and consistent with the rest of the photo.
Remove Objects in Lightroom Mobile
All methods are similar for lightroom android app and iOS app except user interface. In mobiles the healing icon toolbar is in the bottom of the screen.
- Selecting the Healing Tool
- Tap the Healing icon in the toolbar at the bottom of the screen.
- Choose between Heal or Clone options based on your needs.
- Adjusting the Brush Size and Feather
- Use the sliders to adjust the brush size and feather for precise control over the area you are editing.
- Zoom in on the area you want to remove for better accuracy.
- Brushing Over the Object
- Tap and drag your finger over the object you want to remove. Lightroom Mobile will replace the object with surrounding pixels automatically.
- If using the Clone option, select a similar area to copy pixels from by dragging the source pin to the desired location.
- Refining the Healing Adjustment
- Fine-tune the healed area by adjusting the size and position of the brush strokes.
- Use the Erase tool to remove any excess areas that were accidentally brushed over.
Tips for Remove objects in Lightroom
- Choosing the Right Tool for Different Types of Objects
- Use the healing brush for small, simple areas.
- Use the clone stamp for more complex textures.
- Use content-aware removal for larger objects.
- Working with High-Resolution Images for Better Results
- High-resolution images provide more detail, making it easier to blend edits seamlessly.
- Zooming in for Precision
- Zoom in to closely inspect and fine-tune your edits, ensuring they look natural.
- Keeping a Natural Look by Varying Brush Size and Opacity
- Adjust the brush size and opacity to match the surrounding area and avoid creating noticeable edits.
Common Mistakes to Avoid
- Overusing the Tools and Creating Unnatural Edits
- Using the tools too much can make your edits look fake. Make sure the edits blend naturally with the rest of the photo.
- Ignoring the Background Texture and Patterns
- When you remove objects in Lightroom, it’s important to pay attention to the texture and patterns of the background. Zoom in and out for an inspection of your image to ensure all details are visible. If these aspects don’t align, it means your edit will be noticeable. Be sure to choose replacement areas that blend seamlessly with the background.
- Failing to Adjust the Brush Settings Appropriately
- Not adjusting the brush size, feather, and opacity can lead to poor results. For accurate edits, make sure you customize these settings based on the area you’re working.
Conclusion
Removing objects in Lightroom enhance your photos and achieve a cleaner look. By practicing and experimenting with different tools, you can master object removal. But with these edits make sure your edits look as natural as possible.
FAQ
How do I undo an object removal in Lightroom?
- If you need to undo an object removal in Lightroom, simply press Ctrl + Z (Windows) or Command + Z (Mac) shortcuts on the keyboard to undo the last action. You can also use the History panel to revert to a previous state.
Can remove large objects in Lightroom, or should I use Photoshop?
- you can remove objects in Lightroom which is great for small to medium-sized objects, removing large objects might be more challenging. For extensive object removal, Photoshop offers more advanced tools and might be a better option.
What are the limitations to remove objects in Lightroom?
- It is difficult to remove objects in lightroom that are very large. In such cases, results might not be good, and using a more advanced tool like Photoshop may be necessary.


