Learn how to add presets to Lightroom using the latest techniques, whether you prefer setting it up on Windows, Mac or mobile devices. This guide is designed to offer a walkthrough on adding presets to different editions of Lightroom, such as Lightroom Classic (Version 7.3+) Lightroom CC (Desktop Version) and previous versions, like Lightroom 4, 5 and 6.

Understanding Lightroom Version
It’s important to know which version of Lightroom you have before adding presets, as the steps can differ based on the version. Here’s how you can find out your Lightroom version:
- Open Adobe Lightroom Classic or Adobe Lightroom CC.
- Go to the Menu Bar. Click on “Help.”
- Choose “System Info” or “About Adobe Lightroom”, from the drop-down menu to open a dialog box.
- Look for the version number at the top of the dialog box (Lightroom version; 10.0).
Bonus Tip: Regular Updates
Keep Your Software Updated.
Adobe regularly updates Lightroom with features and fixes. Make sure you have the right version for access to all the features and a smoother preset installation process. These updates help you to save your time from more editing.
How to add Presets to Lightroom Classic: Version 7.3+ (.XMP)
Add presets to Lightroom Classic version 7.3 and later through the easy process by using.XMP files. Here is the method for both Windows and Mac operating systems:
In order to add presets to Lightroom Classic for both Windows and Mac, you can follow these three methods. Each method starts from the initial downloading step. Ensure you have your .XMP files ready.
Method 1: How to add Presets to Lightroom Direct Method
Method 2: How to add presets to Lightroom Manually
- Download and Unzip:
- Download and unzip the preset files as described in Method 1.
- Open Settings Folder:
- On Windows: Go to C:\Users\[Your Username]\AppData\Roaming\Adobe\CameraRaw\Settings.
- On Mac: Go to /Users/[Your Username]/Library/Application Support/Adobe/CameraRaw/Settings.
- Note: These folders might be hidden; you may need to enable hidden files to view them.
- Copy Preset Files:
- Copy the unzipped.XMP files.
- Paste them into the ‘Settings’ folder you just opened.
- Restart Lightroom:
- Close and reopen Lightroom Classic.
- The presets should now appear in the Presets panel.
Method 3: How to add Presets to Lightroom Via Import Dialog
- Download and unzip your preset files as described in above method 1.
- Open Lightroom Classic.
- Go to the ‘File’ menu and select ‘Import Photos and Videos’.
- In the import dialog, look for the ‘Apply During Import’ panel on the right side.
- Click on the ‘Develop Settings’ dropdown.
- Select ‘New Preset’ from the dropdown menu.
- This opens the ‘New Develop Preset’ window.
- Click on the ‘Import’ button in the ‘New Develop Preset’ window.
- Navigate to the location of your.XMP files, select them, and click ‘Import’.
- Once imported, the presets will be available in the ‘Develop Settings’ dropdown and the Presets panel.
- Find your newly imported presets in the Presets panel under the specified folder.
Remember to restart Lightroom if you don’t find new presets after you add presets to Lightroom.
How to add Presets to Lightroom CC: Desktop Version (.XMP)
Method 1: Direct Import to Lightroom CC
Method 2: How to add Presets to Lightroom with Local Storage
- Download and unzip your preset files as described in the previous method.
- Open the folder where you’ve unzipped your presets to access the .XMP files.
- Open a new Finder window on Mac or Explorer window on Windows.
- Navigate to the Lightroom CC settings folder:
- On Windows: Go to C:\Users\[Your Username]\AppData\Roaming\Adobe\Lightroom CC.
- On Mac: Go to /Users/[Your Username]/Library/Application Support/Adobe/Lightroom CC.
- Inside the Lightroom CC folder, locate the ‘Develop Presets’ folder. If it doesn’t exist, you can create a new folder and name it ‘Develop Presets’.
- Copy the .XMP files from where you’ve unzipped them and paste them into the ‘Develop Presets’ folder.
- Now, restart Adobe Lightroom CC.
- Once Lightroom CC is open, go to the ‘Edit’ panel, click on the ‘Presets’ button at the bottom, and you should see your newly added presets listed there.
After installation, you can immediately start applying these presets to your photos and see the transformative effects.
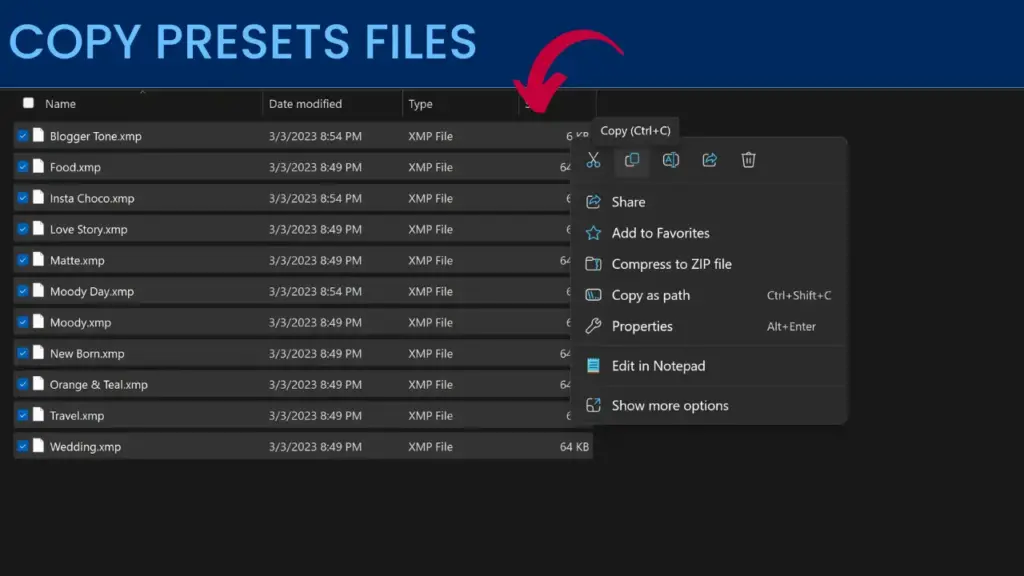
How to Add Presets to Lightroom 4, 5, 6 (Older Versions) (.LRTEMPLATE)
Add presets to Lightroom 4, 5, or 6 involves using.LRTEMPLATE files. These are the older formats for Lightroom presets before Adobe switched to the.XMP format in version 7.3 and later. Here are the detailed steps to add presets to Lightroom in these older versions for both Windows and Mac:
- Find and download the presets you want to use. Ensure they are in the.LRTEMPLATE format, suitable for Lightroom 4, 5, or 6. The presets will typically download as a .zip file.
- Locate the downloaded .zip file on your computer.
- Double-click to unzip the file and extract the.LRTEMPLATE files.
- Launch Adobe Lightroom 4, 5, or 6.
- In the Develop module, look on the left side to find the Presets panel.
- Right-click on any preset within the Presets panel.
- Choose “New Folder” or “Import,” depending on your version. This action prompts Lightroom to reveal the ‘Lightroom Presets Folder’ in a new window. Alternatively, you can go to ‘Edit’ > ‘Preferences’ > ‘Presets’ tab and click on the ‘Show Lightroom Presets Folder’ button.
- In the window that opens, open the ‘Lightroom’ folder, then find and open the ‘Develop Presets’ folder.
- Copy the .LRTEMPLATE files you extracted earlier.
- Paste them into the ‘Develop Presets’ folder.
- Close and reopen Lightroom. This step is necessary for Lightroom to load the new presets.
- Go back to the Develop module and look in the Presets panel. You should now see your new presets listed and ready to use.
As Lightroom has evolved, the newer versions use .XMP files, so ensure you’re using the correct file type for your version.
How to add Presets to Lightroom Mobile Devices (iOS/Android)
How to add Presets to Lightroom for Android
To add presets to Lightroom, First make sure you have the latest version of lightroom. Also download presets DNG files, as these are typically used for mobile presets.
- To import presets to lightroom mobile first download the presets on your computer. They usually come in a .zip file containing DNG files, which are the raw image files that act as presets for mobile.
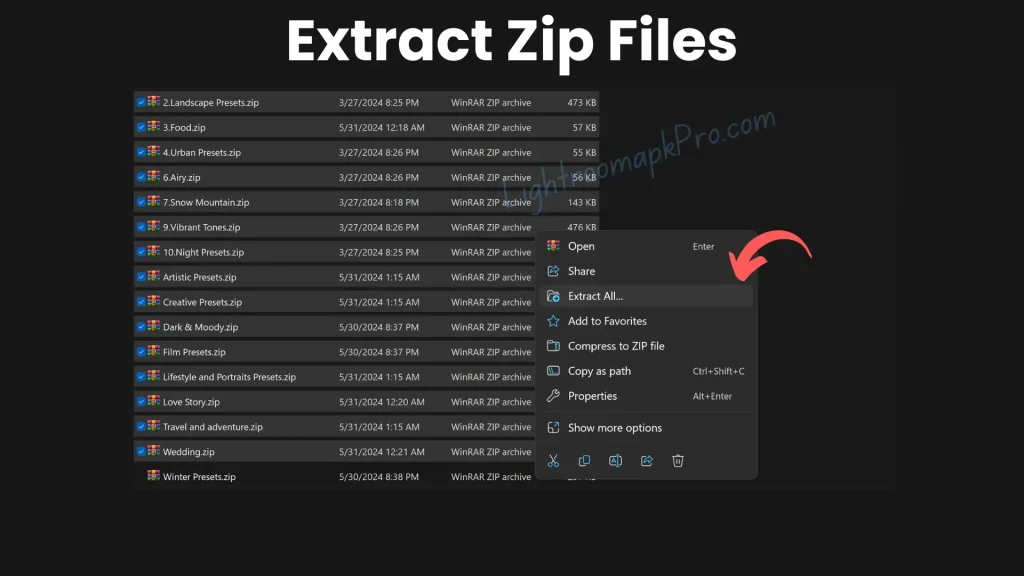
- Unzip the downloaded file to access the DNG files.
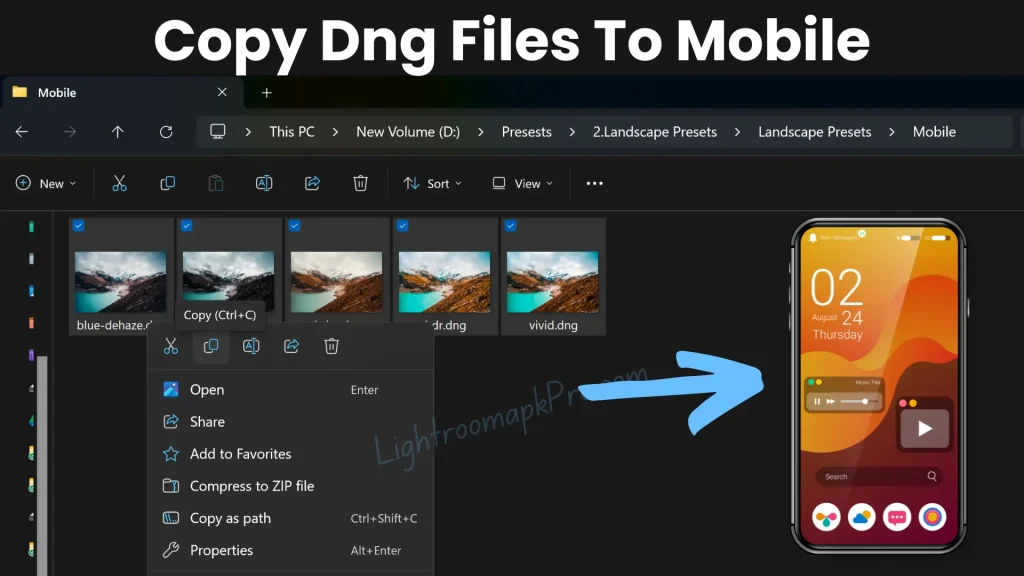
- Transfer the DNG files to your Android device. You can do this via USB, cloud storage, or email, depending on what’s most convenient for you.
- Open the Adobe Lightroom Mobile app on your Android device.
- Create a new album by tapping the “+” sign at the bottom right of the screen and selecting ‘Album’. Name this album something like “Presets” for easy identification.
- Open the newly created album and tap the add photo button (usually depicted as a camera or “+” icon).
- Choose ‘From Camera Roll’ or the location where you saved the DNG files.
- Select the DNG files you transferred and import them into the album.
- Once the DNG files are imported, open one to begin creating a preset. Tap on the DNG image to open it.
- Tap on the three-dot icon at the top right of the screen and select ‘Create Preset’.
- Name your preset. You can also choose to put it in a Preset Group for organization.
- Tap the checkmark at the top right to save the preset.
- Repeat steps 9 to 12 for each DNG file you’ve imported.
Step 1: Extract Presets Zip folders into Pc
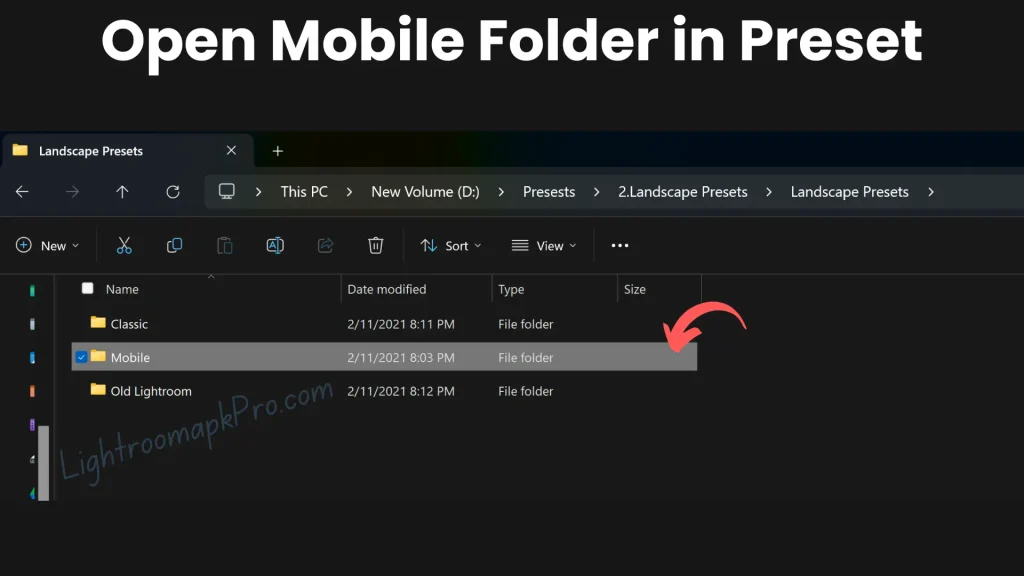
Step 2: Open Mobile folder
Step 3: Copy Dng files from Pc to your mobile through Usb Cable
Step 4: Open Lightroom and click on Presets icon in the bottom pane
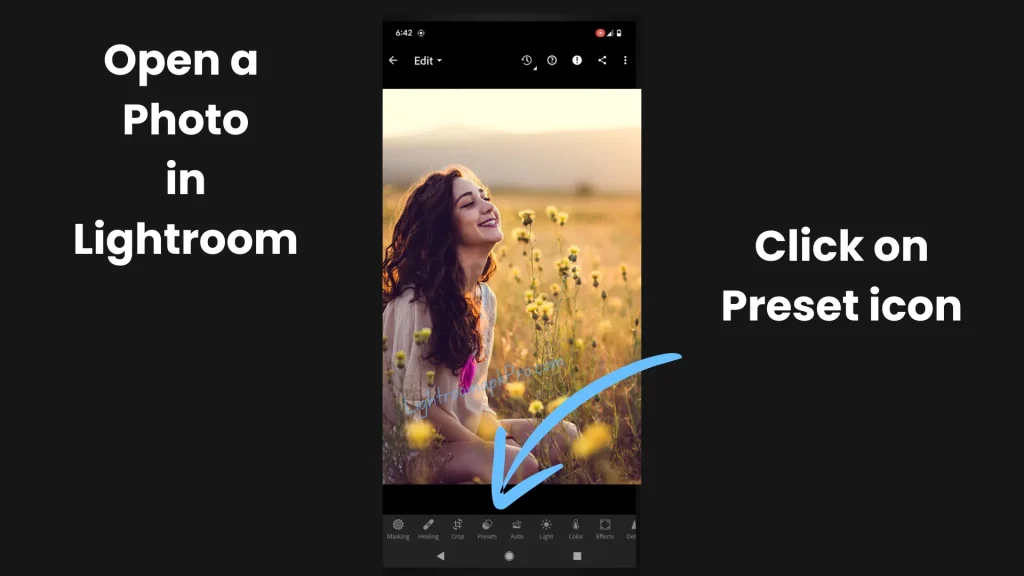
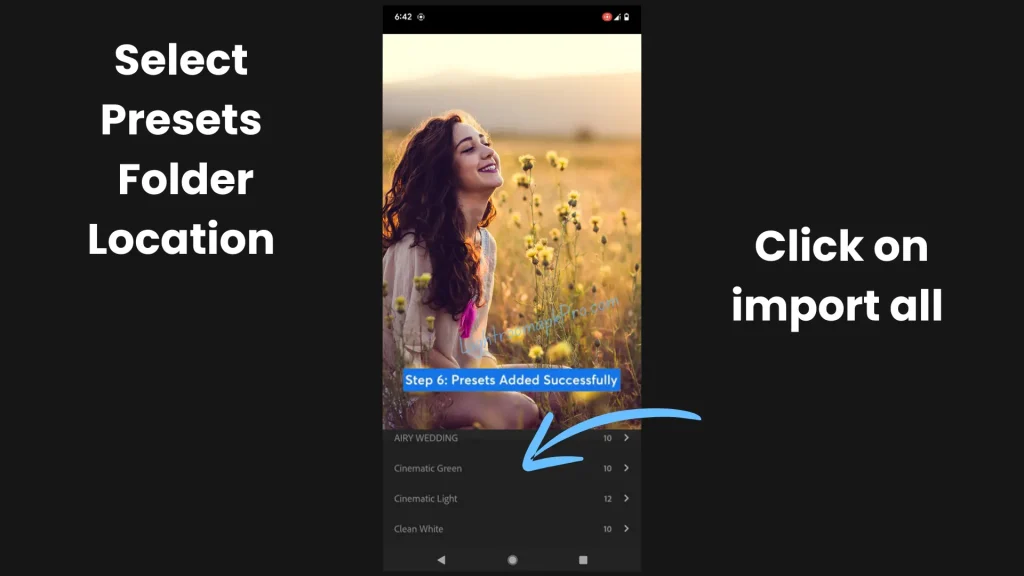
Step 5: Go to Lightroom Presets folder select and add presets to Lightroom
How to add Presets to Lightroom for iOS
To add presets to Lightroom Mobile for iOS, follow these detailed step-by-step instructions. Ensure you have your DNG files as these will be necessary for the process. Also, ensure that you have installed the latest version of Lightroom for iOS.
- Step 1. Find and download the mobile presets you want to use. For Lightroom Mobile, presets often come as DNG files, which are essentially image files that carry the preset settings.
- Step 2. Download these directly to your phone or to a computer and then transfer them to your phone.
- Step 3. If you downloaded the DNG files to your computer, transfer them to your phone using email, or iCloud storage.
- Step 4 . Save the DNG files to your camera roll on your iOS device.
- Step 5. Launch the Adobe Lightroom app on your iOS device.
- Step 6. In Lightroom Mobile, tap on the ‘+’ sign to add photos and select ‘From Camera Roll’ or the location where you’ve saved your DNG files.
- Step 7. Select the DNG files (presets) you want to import and add them to Lightroom.
Create Presets from DNG Files:
- Open one of the imported DNG files by tapping on it.
- Tap on the three-dot icon in the top right corner and select ‘Create Preset’.
- Give your preset a name and assign it to a Preset Group for organization.
- Tap the checkmark to save the preset.
- Repeat for Additional Presets:
- Repeat steps 4 and 5 for each DNG file if you have multiple presets to install.
- Apply Presets to Your Photos:
- To use your newly installed presets, open any photo in Lightroom Mobile.
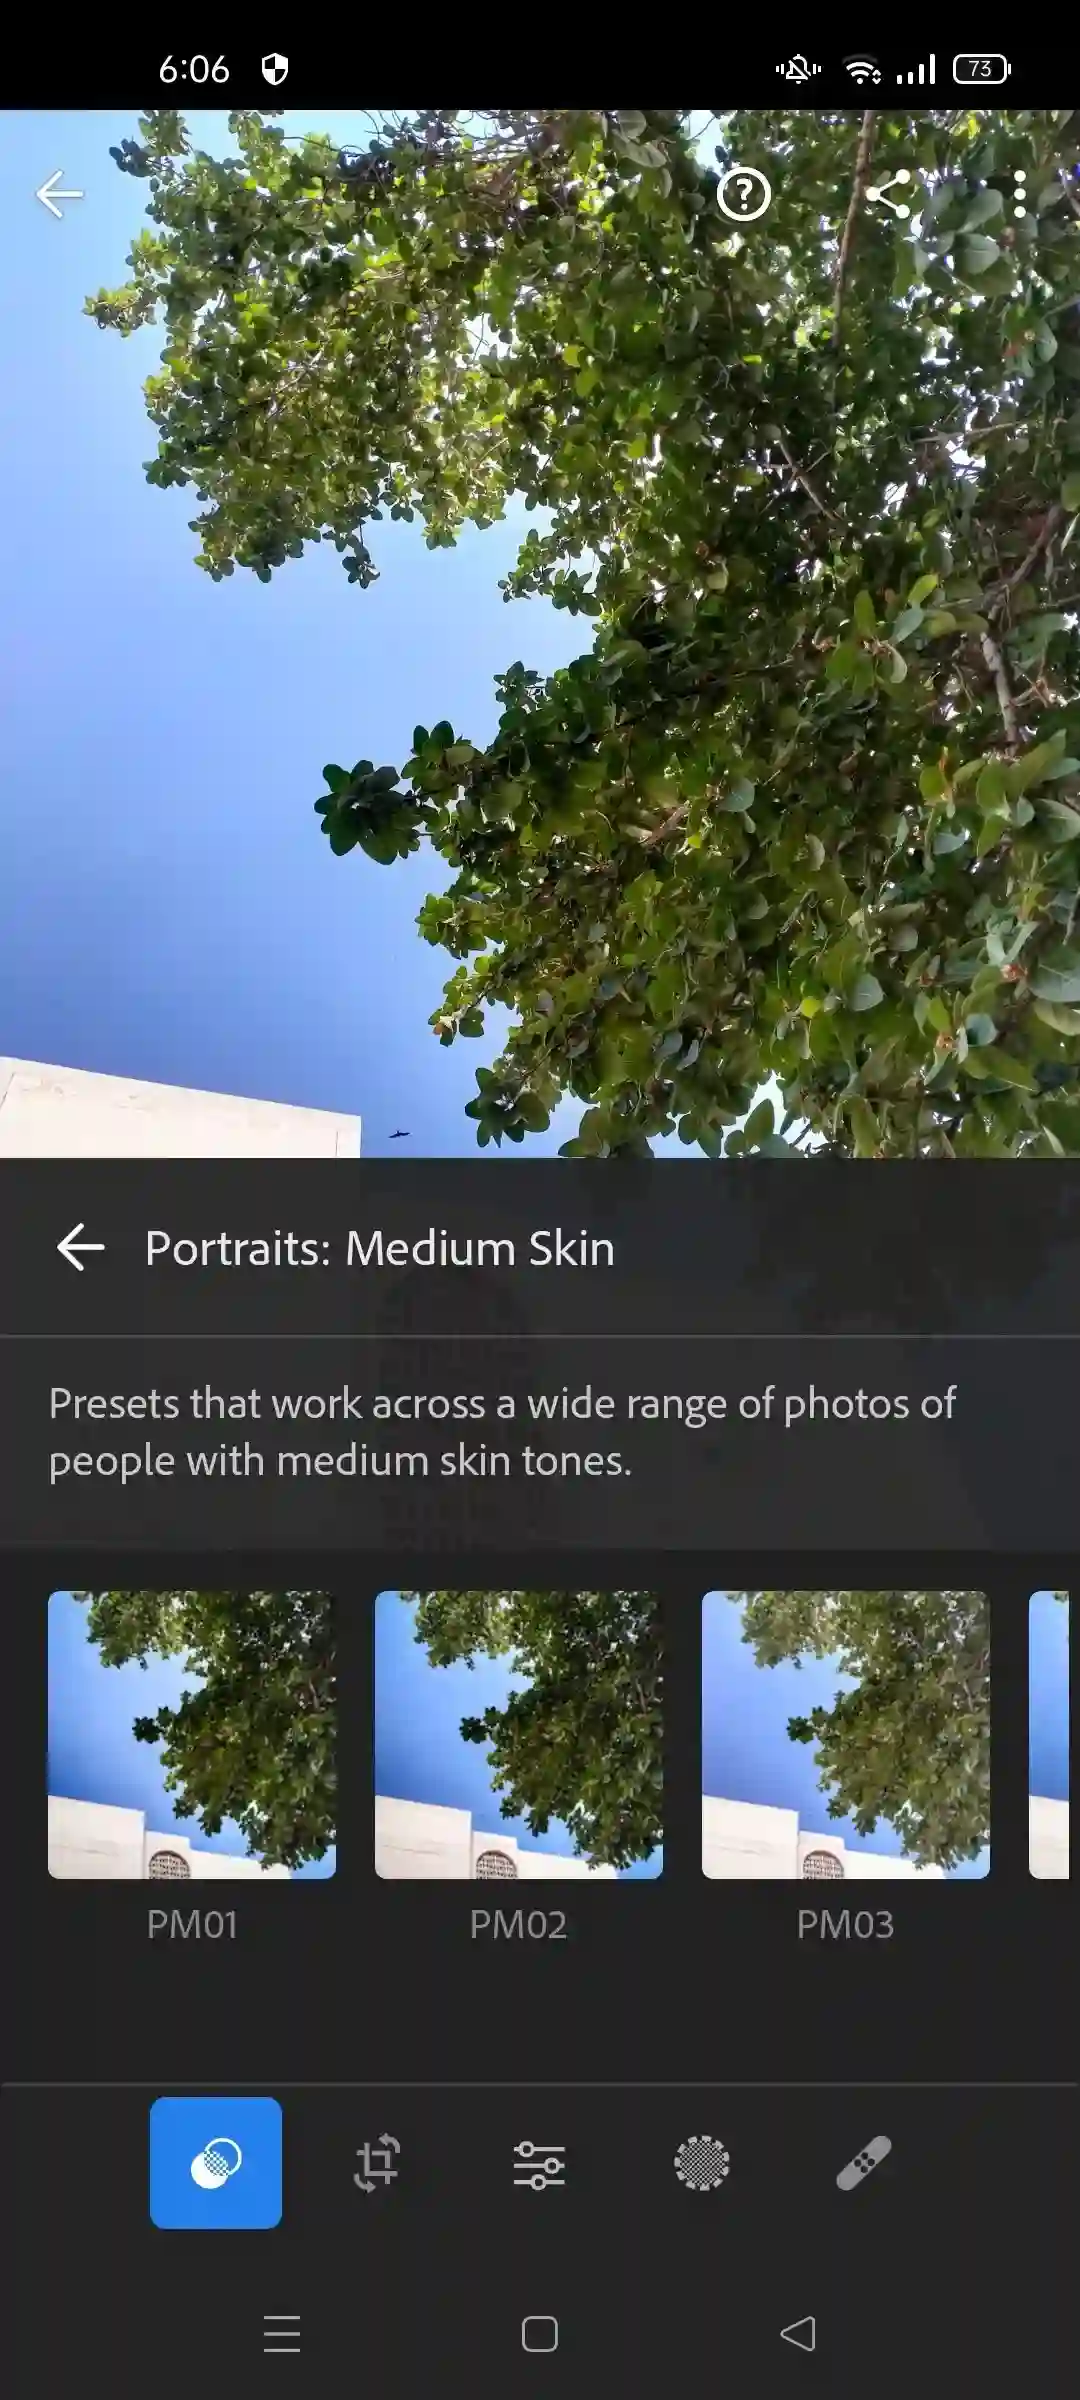
- Tap on the ‘Presets’ icon at the bottom menu bar.
- Select the preset you wish to apply from your list of saved presets.
- Adjust as Necessary:
- After applying a preset, you might want to make additional adjustments. Use the editing tools in Lightroom Mobile to tweak exposure, contrast, color, and more until you achieve the desired effect.
Troubleshooting Common Issues in installation
When you add presets to Lightroom, you might encounter some common issues. Before installation please make sure you have the latest version of lightroom mod apk to ensure stability. If the harware is not latest then you may consider installing lightroom old version from the this list of versions. Here are troubleshooting tips for some of the most frequent problems across all versions of Lightroom:
Presets Not Showing Up After Installation
- Restart Lightroom:
- Sometimes, all you need to do is close and reopen Lightroom after you add presets to Lightroom, for the presets to appear.
- Check the Preset File Type:
- When you add presets to lightroom ensure the presets are the correct file type (.XMP for Lightroom Classic 7.3+ and Lightroom CC, LRTEMPLATE for Lightroom 4, 5, 6).
- Ensure Correct Folder:
- Verify that you’ve placed the presets in the correct folder, especially if you’re manually copying them.
Presets Appear Greyed Out
- Check Compatibility:
- Ensure compatibility with the Lightroom version before you add presets to Lightroom. Some presets are specifically designed for newer or older versions.
- RAW vs. JPEG:
- Some presets are designed specifically for RAW or JPEG images. when you add presets to lightroom, ensure your photo format matches the preset’s intended format.
Presets Don’t Look Right on Photos
- Adjust Exposure:
- Presets are not one-size-fits-all. You may need to tweak exposure or other settings after applying a preset to get the desired look.
- Profile Mismatch:
- Ensure that the preset’s profile matches or is compatible with your photo’s profile. Mismatched profiles can lead to unexpected results.
Cannot Import Presets
- Check File Corruption:
- Ensure the preset files are not corrupted. Try re-downloading them from the source.
- Check File Extension:
- Make sure the file extensions haven’t changed. Lightroom won’t recognize the files if the extensions are incorrect.
- Permission Issues:
- Ensure you have the necessary permissions to add files to the Lightroom presets folder, especially on Mac.
Presets Missing After Update or Reinstall
- Backup Presets:
- Always keep a backup of your presets. If Lightroom is updated or reinstalled, you might need to re-import them.
- Check Cloud Sync:
- If you’re using Lightroom CC, ensure your presets are synced with the cloud before reinstalling or updating.
General Tips:
- Keep Lightroom Updated: Before you add presets to Lightroom, ensure you’re running the latest version of Lightroom. Adobe regularly releases updates that can fix bugs and improve performance.
- Consult Community Forums: If you’re experiencing a unique issue, someone else might have had the same problem. Look for solutions on Adobe forums or photography communities.
- Reinstall Lightroom: As a last resort, try uninstalling and then reinstalling Lightroom. Remember to back up your presets and photos before doing so.
By following these troubleshooting tips, you should be able to add presets to Lightroom without any common issues. If problems persist, consider reaching out to Adobe Support or the preset creator for further assistance.
Conclusion
I hope this guide has empowered you to confidently add presets to Lightroom and enhance your beautiful photos. If you find the variety of methods difficult, just choose one that seems most straightforward and give it a go. If it works well for you, there’s no need to complicate things by trying others. Happy editing!
FAQs
Disclaimer
All the information on this website Lightrroomapkpro.com is published for introductory purpose only. All of the provided downloadable links are collected from different sources over the internet, being a public domain. We encourage you to contact us anytime if you see any copyrighted material and want to remove it from our site.
This website is independently operated and not associated with Adobe Inc.


